
Improvement, remodeling, & repair - my experiences
| Tuning Your 1947 Roof In the course of remodeling/repairing/improving my home, I realized applying new roofing to the house roof was going to be a difficult task. The surface had sunk into a slightly concave shape due in part, I think, to the intense heat of a wood burning stove in the rooms below. My elderly father had installed a wood stove to reduce his utility costs. He had developed poor circulation and was overweight. Keeping warm, for him, meant keeping a room temperature higher than some might find comfortable. Trying to roof such a surface is impossible to do well since the task is similar to wrapping an orange with a sheet of paper without wrinkling. The task is a physical impossibility. An older roof does not have trusses to support the roof plank. Thus with time the roof may sink Modern houses use sheets of synthetic wood or plywood where older homes use strip planking laid across the roof rafters. Hand made truss members can be cut and installed under the rafters whether your sunken roof has had the plank replaced with plywood or not. The project should not be too much worry. The tuning part is the use of a hammer to adjust the angle of each truss until the sag in the roof is gone. One truss for each rafter is the rule but if you're on a tight budget, you can halve the number with no risk. Stock 2x4s are used for trusses and a plank is laid down on the ceiling joists as a base and footing for the trusses. Each truss is rounded on the upper end and cut to a heel at the bottom to lye flat on the truss-base plank. The length of the trusses is variable. The top end needs to be near the center of the rafter. That's where the force needed will be least. The base of the truss needs to be close to that point directly under the rafter peak. This too will minimize the force necessary to place the truss. Ideally, the truss will be perpendicular to the rafter. If so , there will be a minimum of force needed to place the truss into position. If you think about it, this all may become obvious. |
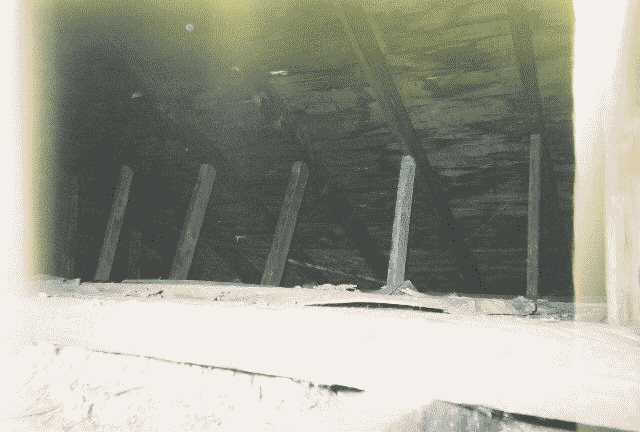 Attic trusses installed in '47 woodframe house |
|
Jacking the House Up. Perhaps the scariest part of the job was, for me, lifting the front of the house off the foundation. The front wall had collapsed and the front wall dropped by about six inches. This wreaked havoc with the gypsum wall board inside of the house. Cracks occurred in the walls at the front of the house, windows on the front wouldn't close properly and the exterior wood siding warped and two of the floor joists warped and cracked. The biggest fear was completely irrational - that the house would fall down. The house was sitting on three walls when I started, so it would be extremely unlikely that it would fall. The other part was more realistic. I feared one of the floor jacks would spring out from under the load, and one did. I re-examined my methods and paid more attention preparation, using a level on two sides of a jack to insure true a vertical and placed the bottoms on concrete footings. The footings were made from overturning white plastic buckets, cutting a pouring hole in the upturned bottom, and filling with cement.. I used 4x4 or 6x6 beam sections about 3' or 4' long, enough to run under two or three floor joists. What I could find to read on the subject suggested raising the jacks together in half-inch per week intervals. I decided that in warm summer weather, I could go faster than that.I went one or two inches per day. I had used a rented laser level to plot the earthen floor excavation and new foundation section and made checks on the floor level of the house. Houses settle over time. The rear of the house had settled more than the front.That surprised me. The rear portion of the house was taken up by two bedrooms. The front of the house had most of the weight. Kitchen appliances, living room furnishings (television, stereo, etc.). I made some decisions and proceeded. For anyone whose has no idea what a floor jack is, the kind used in a stand-up basement consists of two steel tubes, on inside the other. The inner tube telescopes out and is fixable by inserting two steel pins (1/2" dia.) into holes in the upper section of the inner tube. There is one inch screw that is inserted into a removable base in the top of the inner tube, this is for fine adjustment over three or four inches. The steel pins and tube holes are for overall adjustment of between four and eight feet, depending on the jack purchased. These jacks ran about $35 at home improvement stores in 2004. I rented a Bobcat © front-end loader, and Bobcat © backhoe for excavating the basement floor and front foundation footing. Needless to say, I had to take a hammer and chisel to the basement entry way to expand the width to 54" for the machinery. | 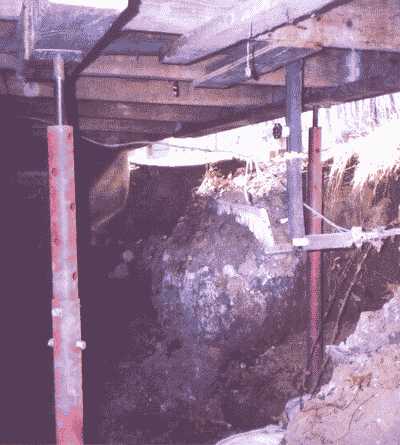 Jacks under the floor before excavating for the new wall foundation |
|
Building Walls Without Mortar There is a way to build a better-than-ordinary cinderblock wall without using mortar. Most manufacturer's of home cement/concrete products make a mix that is applied to the outsides of walls of stacked cinderblock. No mortar is used. The product is called surface bonding cement and will result in a stronger, waterproof, and usually white walls when applied to walls, outside and inside . I used this product last year on a replacement for my front foundation wall. Find specifications at manufacture's sites. The process is commonly referred to as block drystack . Check your local building codes for restrictions. Your local public library may have a copy of the local codes, if not the local government may make them available. Quickcrete's Quickwall and Bonsal's Surface Bonding Cement are two online producers. The SBC is applied in one of two ways, a trowel, or a cement spray gun. The idea is to get a consistent 1/8" thickness across the whole wall. The most work goes into getting a straight and level foundation poured first. If your foundation is level, you won't have to level the base with a trowel and concrete. Use a brick layer's string and story pole to make sure your wall is level and straight. If the wall is good, all you have to do is stack the block in the usual pattern (known as English bond) and coat. Here is original reference from Haynes-Simmons (1974).. |
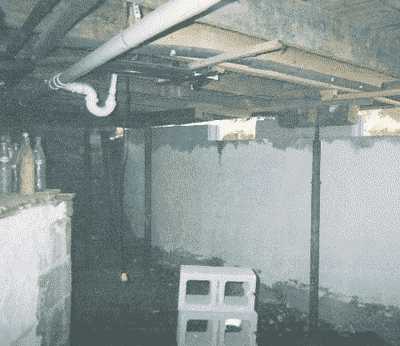
Collapsed foundation and house jacks. |
Sewers Along with a sagging roof, a 1947 house may be accompanied by old clay pipe. Replacing all clay pipe with standard Schedule 40 PVC is a good idea. Especially when the weight and mess of clay is considered.. All that is required is a tractor to run over the pipe area and you could get a crack. Once you get that crack, eventually, a tree root will find its way into the pipe. The time and effort is really worth the peace of mind. Do the replacement all in one project. That way, no splicing of the old into the new will need to be done. Simply dig up all the old pipe and install the new pipe. Clay is difficult to cut and easy to chip. I used a carborundum blade on my hacksaw. The going was so slow I cut the blade in half and trimmed the tang with metal snips and used a battery powered reciprocating saw (e.g."Sawz-All"(R)) to finish the job. The cutting allowed me to do a section at a time, patching PVC and clay together temporarily with a rubber boot made especially for that purpose. This way I could spread the replacement out over months. PVC is light, easy to cut, and glued instead of being packed with cement at the joints. If you do not have the original plumber's layout for your home's sewer lines, then you will probably end up doing what I did. Start at that point where you know the sewer comes out from under your house and begin digging there. I worked by hand using picks and shovels. A mini-backhoe can be rented from rent-all stores that specialize in construction equipment. Some of the clay will get broken, but a lot of time and energy will be saved. The cost in this area will be about three hundred dollars per day. One day to dig up the old sewer pipe. A second day to lay, glue, and cure the PVC pipe. Finish with a third day to cover up the new pipe. Along with sewer remodeling frequently comes the issue of easements and trees. If your sewer runs across someones property, your deed probably has an easement written into it. This allows you the right to go onto the property for sewer related work. You may want to check. Trees. If a 100ft tall tree 2 1/2 feet in diameter straddles your sewer pipe and your pipe is 50 year old clay, propbably cracked in several places eventually, .the sewer will have to be re-routed around the tree or the tree cut down and the stump removed. In my case the former occurred. I hired a plumber to deal with the clogged sewer line after I had spent weeks trying to uncover the nature of the clog, how extensive the clog was, and begin repairs. The plumber dug a trench around the problem section and spliced pipe in at both ends, bypassing the problem area. He referred to the section as a "sweep". The tree was not my responsibility. The owner was liable for repairs since my easement had been blocked by his tree. The sewer was used by my neighbor too. In the 1940's, when the house was built, More than one person could share a sewer line. In my county, current building codes require only one person be connected to a branch off a main sewer line. I worked out terms for compensation with my neighbor. His pipe is still all clay and needs replacing. I've done all but 20 feet of mine. |
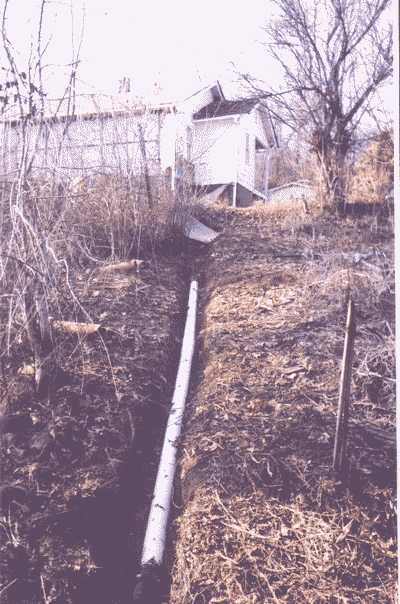 Replacing external clay sewer line with 4" PVC
 |
|
Tree "Origami" I applied basic Origami to cutting down trees. The application of the term Origami may be a misnomer, but it is a creative one. Fold a strip of paper down, top-to-bottom and you have the way most people cut down trees. Fold down and across at an angle and you have a way of felling the tree in a direction determined by the angle as much or more than Gravity. Tree Origami requires Tree Zen. This page shows and tells more. |
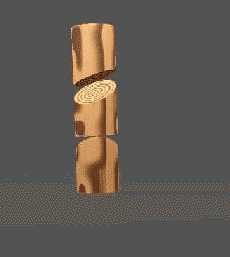 CGI drawing showing an example of a diagonal tree cut. |
|
Rules and Regulations Check with your local government for restrictions, conditions and fees. Your state code will contain more information and puts limits on what local ordinances can do. Most municipalities adopt a nationally known set of standards. This saves a tremendous amount of time money and energy expended in duplication This saves each town from having to re-invent the wheel. Most Tennessee public libraries will have a copy of the Tennessee Code Annotated ( state laws) and the local building codes (local ordinances). If you are planning extensive remodeling/repairs you may want to do an extensive study of the relevant laws and ordinances. |
|